
How to install an SSL certificate (Free AutoSSL)
In today’s digital world, securing your website with an SSL certificate is essential for protecting sensitive information and building trust with your visitors. It also helps improve your website’s SEO ranking and overall credibility.
If you’re using cPanel, you’re in luck — it includes an easy-to-use feature called AutoSSL, which allows you to install a free SSL certificate in just a few steps. Follow this simple guide to enable SSL protection for your website.
- Log in to your cPanel Account.
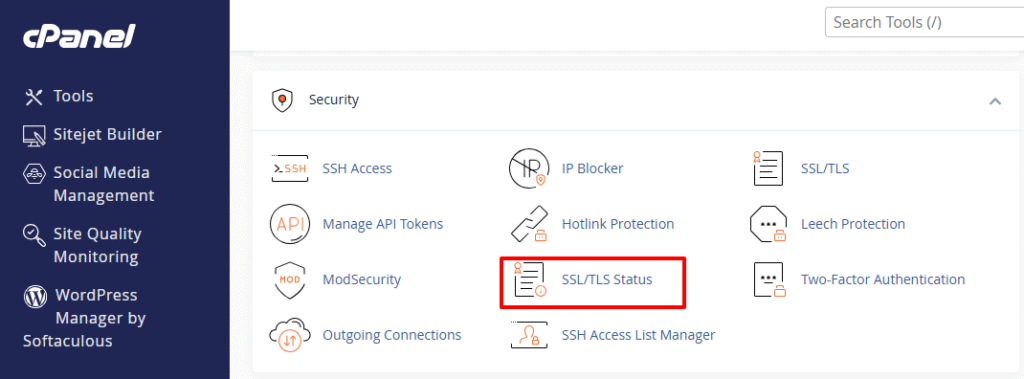
- Once logged in, scroll down to the Security section. Click on SSL/TLS Status to open it.

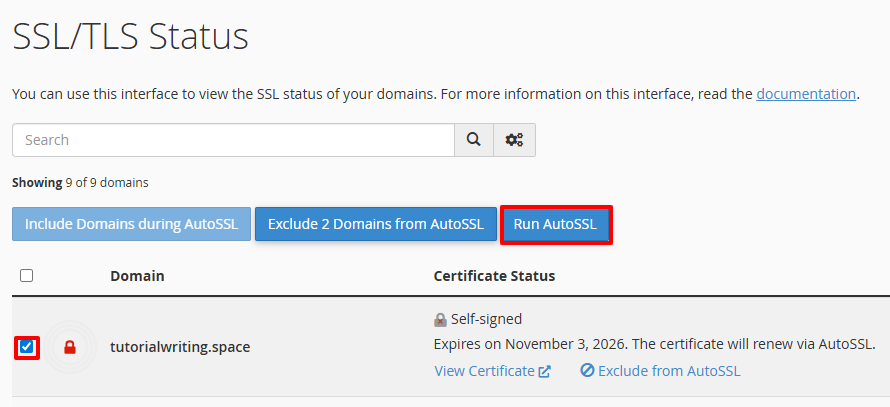
- You’ll see a list of all your domains and subdomains, along with their current SSL status.

- Check the box next to the domain you want to secure, then click Run AutoSSL. Wait a few minutes while AutoSSL automatically issues and installs your SSL certificate.Note: For the SSL certificate installation to be successful, your domain’s DNS must already point to your MaxCyberHost hosting account. If your DNS settings are not updated, AutoSSL may fail to install the certificate.

- Once the AutoSSL process is complete, you’ll see a green padlock next to your domain, indicating that the SSL certificate has been successfully installed.



Your SSL certificate is now active, and your website is secured with HTTPS. The AutoSSL feature will also automatically renew your certificate before it expires, ensuring continuous protection without any manual effort. With your website now secure, you can confidently focus on managing and growing your online presence.