
How to Create and Restore Backups in cPanel
Managing a website requires regular maintenance, and creating backups is essential. Backups protect your data from server failures, hacks, or human errors. cPanel provides a simple interface to create and restore backups. This guide explains how to manage backups step by step.
Creating Backups in cPanel
cPanel offers full backups and partial backups.
1.Full Backup
A full backup includes all website files, databases, email accounts, and settings.
Steps to create a Full Backup:
- Log in to your cPanel account.
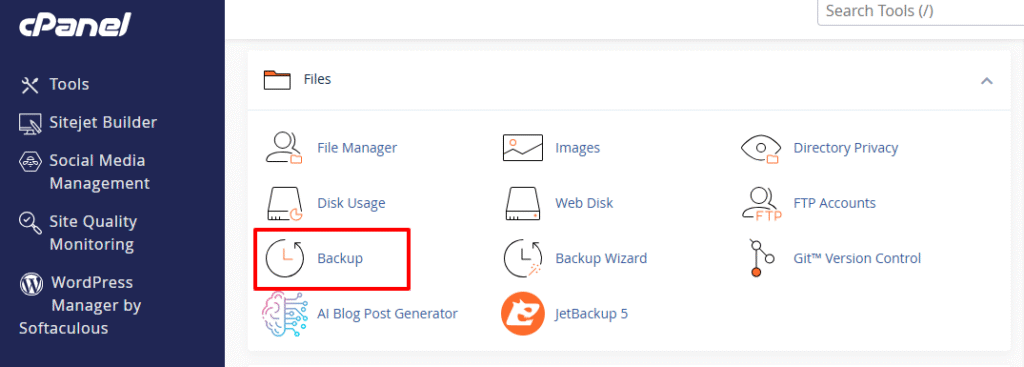
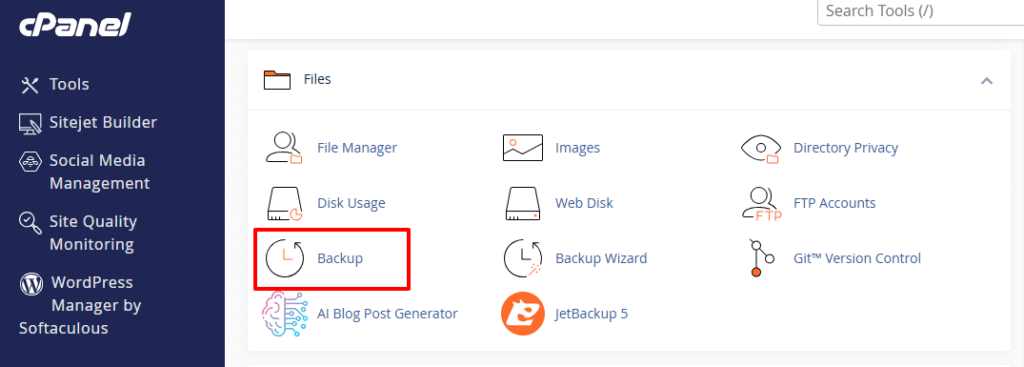
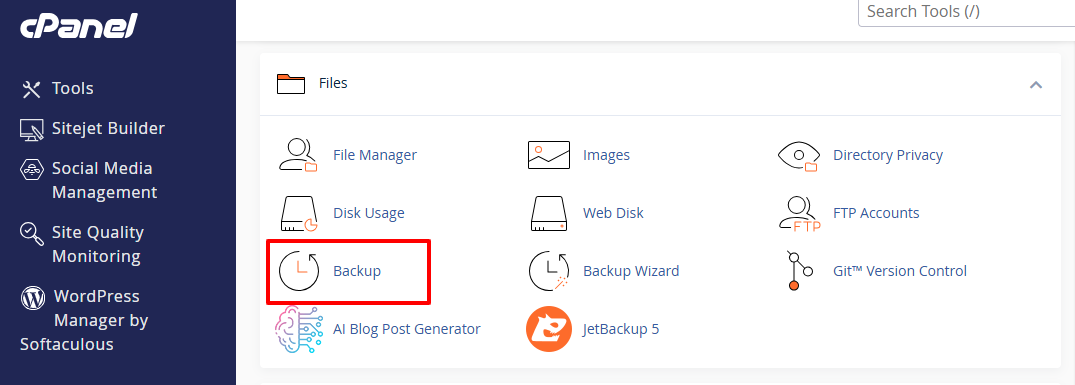
- Navigate to the Files section and click on Backup.

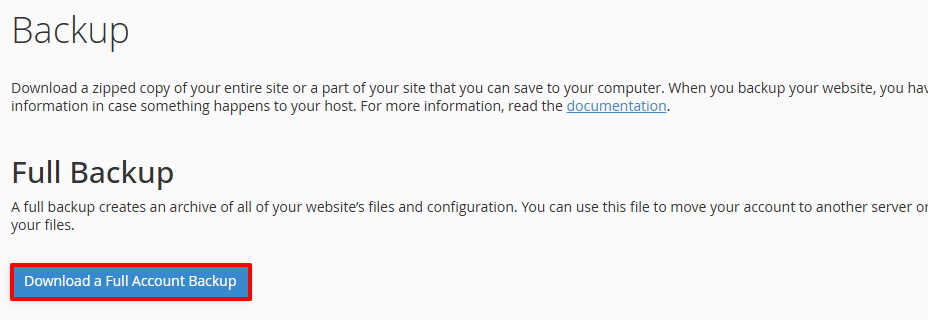
- Click on Download a Full Account Backup.

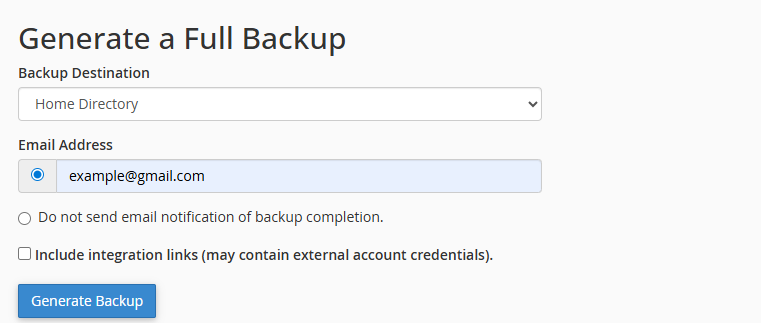
- Choose a backup destination. By default, cPanel stores backups in the Home Directory. You can select another location if preferred.

- Enter your email address to receive a notification when the backup is complete.

- Click Generate Backup to start the process

- You will see a confirmation message that the backup has started.

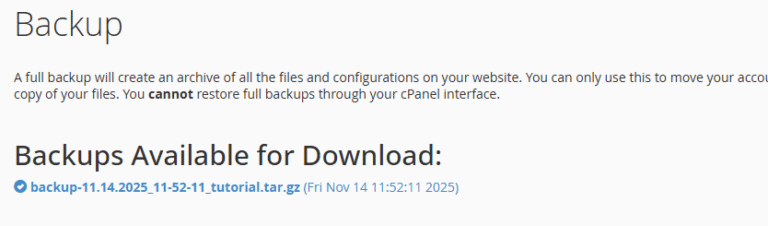
- Click Go Back to check progress. After completion, download the backup to your computer for safekeeping.




2. Partial Backups
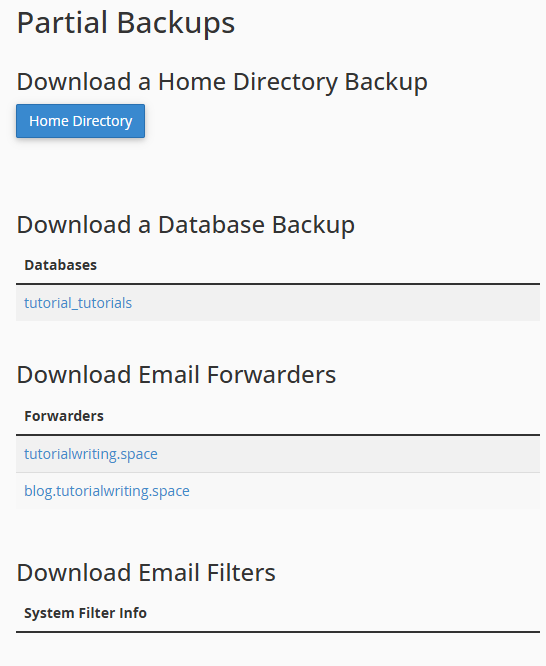
Partial backups let you back up specific parts of your account, such as website files, databases, email forwarders, and email filters.
Steps to download a partial backup:
- Log in to your cPanel account.
- Go to the Files section in cPanel and click on Backup.
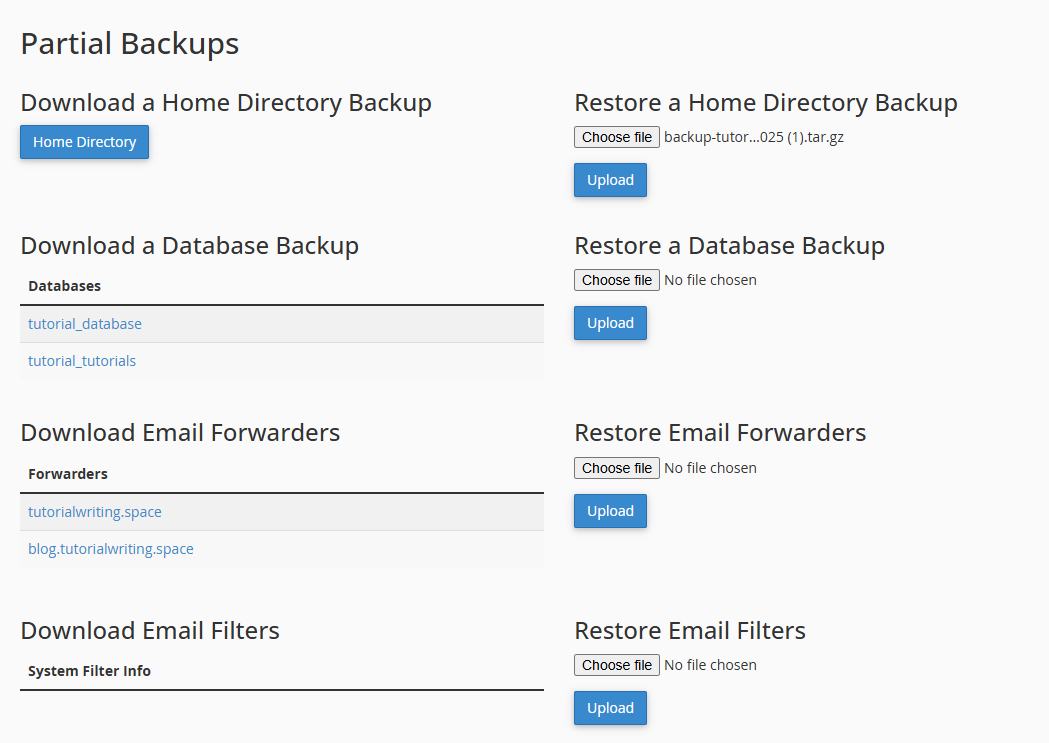
- Under Partial Backups, select the type of backup you need (Home Directory, Database, Email Forwarders, Email Filters).

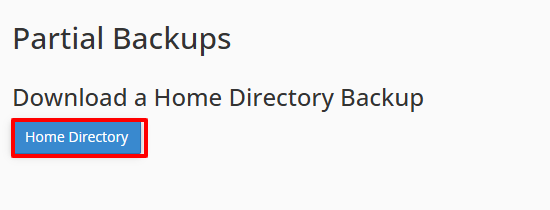
- Click the Home Directory button to download website files.

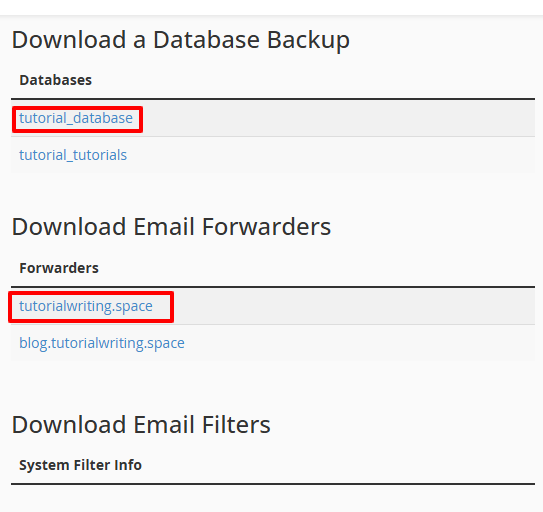
- Click on the specific database name, email forwarder name, or email filter rule you want to download, and save it to your computer.

Restoring Backups in cPanel
Restoring backups helps recover your website, databases, or email settings after errors or data loss.
1. Restoring a Full cPanel Backup
Restoring a full cPanel backup cannot be done directly through the cPanel interface. You must contact our support team for assistance.
Steps to Prepare for Full Backup Restoration:
- Upload the full backup to your Home Directory.
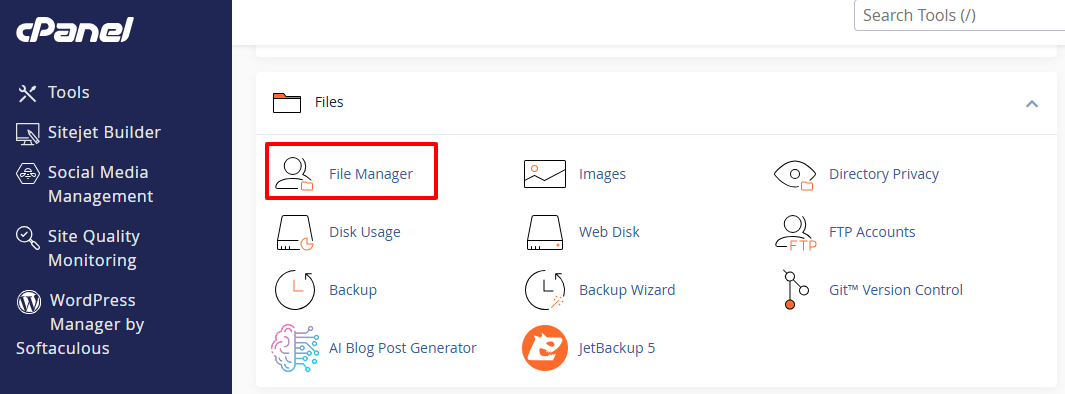
- Go to Files section and click File Manager.

- Click on the Upload button and select your full cPanel backup file (.tar.gz).

- Once the file is uploaded, open a support ticket and request restoration. Support team will restore the backup for you.

2. Restoring Partial Backups
Partial backups can be restored directly in cPanel. These include Home Directory, databases, email forwarders, and email filters.
Steps to Restore a Partial Backup:
- Navigate to the Files section and click on Backup.

- Under the Partial Backups section, choose the type of backup you want to restore.
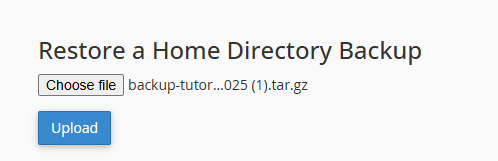
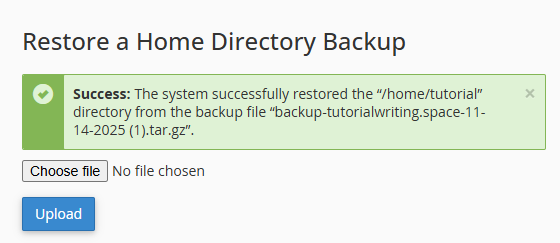
- Click the Choose File button and select the backup file from your computer.

- For Home Directory backups, select the backup file and click Upload.

- You will receive a confirmation message indicating that the backup has been successfully uploaded and restored.

- Repeat the same process for databases, email forwarders, and email filters. Click Choose File, select the backup from your computer, and click Upload to restore each one. You will see a confirmation after each restoration.
Creating and restoring backups in cPanel protects your website, databases, and email settings. Following these steps lets you manage your data effectively and ensures it remains safe and recoverable in case of accidental changes, data loss, or server issues.