
How to Create an Email Account in cPanel
cPanel provides a user-friendly platform for managing web hosting services, including the ability to create personalized email accounts for your domain. In this guide, we will walk you through the straightforward steps to set up your email accounts in cPanel, ensuring a smooth and efficient start.
To create an email account in cPanel, follow these steps:
- Log in to your MaxCyberHost Client Area.
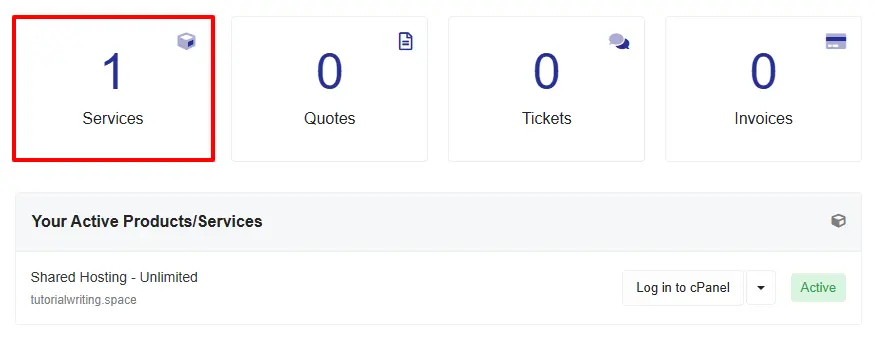
- In the top menu, click on Services to view your active hosting accounts.

- Select the hosting plan you want to manage by clicking the Active button next to it.

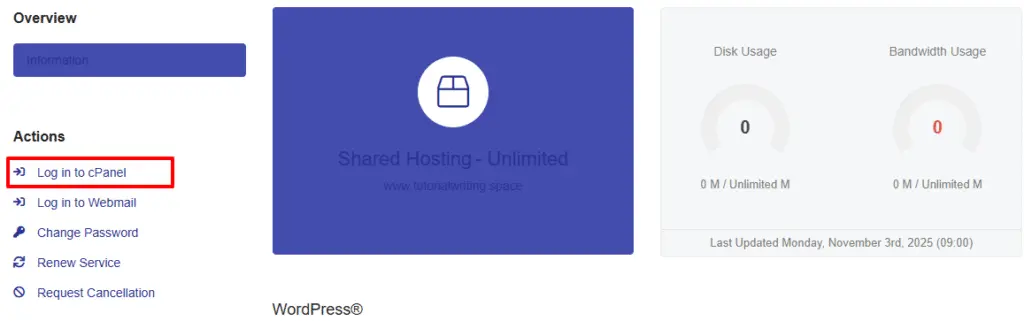
- In the left-side menu under the Actions section, click on Log in to cPanel.

- Once you are logged in to cPanel, navigate to the Email section and click on Email Accounts.

- Click the + Create button.

- You will now see a form to create a new email account:
- Domain: Select the domain for which you want to create the email account.
- Email Name: Enter your preferred email name.
- Password: Set a strong password or use the password generator.

- To access optional settings, click on the Edit Settings button.

- Set the storage space for the email account, or choose Unlimited if you do not want any limits.

- After finalizing all the details, click the + Create button.

- Your new email account will now be listed among the active accounts.




Congratulations! Your new email account is ready to use. Access it anytime through webmail on your cPanel dashboard or set it up in your preferred email client. This account will help you organize your personal and professional communications effectively. Enjoy the features it offers!